Not wanting to pay $2500 - $3500 for a ready made racing SUP though, and because of my previous experience building several wood/glass/epoxy kayaks I decided to build a hollow wood / glass/epoxy SUP kit.
The one that appealed to me most was the Clearwoood Paddle Boards "Cascade 14". See:
I received my complete Cascade 14' kit from Randy Bogardus, Owner and designer of Clearwood Paddleboards including the Cascade 14, in April 2017. See the Clearwood Paddle boards website at:
http://clearwoodpaddleboards.com/

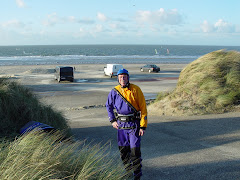
Randy Bogardus on his Cascade 14

16' x 3' Work Table. Can be disassembled into 6' center and two 5' end sections.
I spent three weeks working on and off rebuilding my old 18' work table I had previously used for building two Chesapeake Light Craft kayaks. The hardest part was getting each table section level.and squared with the other sections so that the whole table was level end to end and side to side.

16' x 3' work table and Cascade 14 "Wishbone" frame being laid out.

Using carpenters square to layout frame ribs lines perpendicular to center stronger lines after epoxying center stringer sections together.
At this time (June 2017) I searched for a thin kerf tablesaw blade to save wood and $$ when cutting and ripping the expensive Paulownia Wood planks that I purchased as part of the Cascade 14 kit from Clearwood Paddle boards. I ended up getting the Total Saw Solutions 10" Micro-kerf saw blade which is only 1/16" thick!!! It cuts, rips and resaws the Paulownia wood beautifully leaving a very smooth surface. It generates a lot less saw dust, is quieter and definitely easier on my 1 1/2" tablesaw motor. It is well worth the $$ and will be used on lots of other projects too. Check it out at:
http://www.totalsawsolutions.com/page/10-in-micro-kerf-40-table-saw-blade


Wishbone frame dry assembled.

Epoxying on glue strips to each frame rib to add glueing surface for deck and upper rail wood strips.
I discovered that adding wood glue strips to the perimeter of each frame is a big job and is best done before epoxying the frames to the center stringer!
I used 1/4" thick by 1/2" wide strips of Balsa wood to make these giving me an additional 1/4" of glueing surface per frame edge. Balsa is very light weight but strong and I have used it before with no problems for this purpose on my old Mitchell Wing aircraft spruce frame, foot launched hang glider / ultralight sailplane. Stories and photos of this glider are found in this blog.
It takes a lot more time than I anticipated to cut, epoxy to each frame member slightly proud and then trim and sand off excess. To do so I used a hand coping saw, hand plane and sanding block. I only did the deck and foredeck sections of each frame and the upper ! rail sides for now. Wanting to save time to get.on with the project I decided to add the bottom surface glue strips when I turned over the board.
It would be great if somehow each ClearwoodPaddleboard kit would include pre-cut glue strips matching each frame perimeter that could be glued down to each frame prior to assembly of the wishbone frame. Being able to do so by laying each frame flat on the table to glue the strips and not having to cut out each strip would really save building time.
Glueing the Frames to the Stringer
At this point I am finally ready to epoxy each Rib frame to the center stringer. To do so I am using epoxy mixed with Cabosil (Collodial Silica) epoxy thickener mixed to smooth, soft ice creme consistency. Over the years I have found it to be outstanding for glueing up strong structural wood to wood bonds.
In preparation for glueing with this I apply paint masking tape along the side of each glue joint leaving about 3/16" of wood showing back from the edge of each joint. This allows me to glue up the joint and make nice epoxy filler fillets along the seam of each joint. It also prevents smearing epoxy filler on the bare wood too far out from the edges of each glue joint making more work to clean off and adding excess weight from uneccesary epoxy saturation of the wood fibers outside of the joint. The epoxy/silica filler mix cures to an very hard state that is difficult to sand and/or remove so this is another reason to work cleanly with it and use The masking tape.
After applying the epoxy and fixing the frame in place properly I wait until the epoxy has started to harden and thicken up a little. Then I pull each strip of tape off carefully. If you wait until it fully hardens then pieces of the tape may stick to the wood and be hard to remove.


Nice & Neat Epoxy-Silica fillet glue joint
after tape removal
Aft 10 Frames taped and ready for glueing
Positioning Fairing Battens and
Deck Accent Strips


Experimenting with nose deck layout.

Making Fairing Batten facets to improve rib frame to strip glue surface contact

Starboard Fairing Batten in place and portside waiting for epoxy to set.